


Choosing the right drill bit size for your wall anchors might seem like a small detail, but it’s absolutely crucial for a secure and lasting installation, especially in drywall. Getting it wrong can lead to frustrating problems – loose fittings, damaged walls, or even anchors failing under load. As Allen, representing a factory with 7 production lines specializing in high-quality Self-Drilling Anchor Systems and Drilling Tools exported globally, I’ve seen firsthand how proper installation techniques impact the performance and reliability of our products. Our customers, like Mark Davis from the USA, value quality and reliability, and ensuring their end-users can install our anchors correctly is paramount. This guide simplifies the process of selecting the correct size drill bit to use, ensuring your anchors hold strong, reflecting the quality of the components used – whether it’s a simple plastic anchor or a robust Expansion Shell Anchor Bolt. Read on to avoid common pitfalls and guarantee secure mounting every time, making your projects smoother and safer.
Why is Matching the Drill Bit Size to Your Anchor So Important?
Using the correctly sized drill bit when installing wall anchors is fundamental for several reasons. Firstly, it ensures a snug fit. The anchor needs to grip the surrounding material (like drywall) firmly. If the hole in the wall is too large, the anchor won’t have enough friction or purchase to hold securely. It might spin when you try to insert the screw, or worse, pull out easily under minimal load. Imagine hanging a shelf – a loose anchor could mean disaster!
Secondly, the mechanism of most anchors relies on precise hole size. Many plastic anchors with expanding bodies or toggle bolts need the confines of the correctly sized hole to expand properly or deploy their wings effectively behind the drywall. An oversized hole prevents this mechanism from working as designed, compromising the anchor‘s holding power. Conversely, if the hole is too small, you risk damaging the anchor or the drywall itself while trying to force it in. You may have to tap the anchor gently with a hammer, but excessive force indicates the hole is likely too small, potentially causing the drywall to crumble or the anchor to deform. Getting the size drill bit spot-on ensures the anchor works exactly as intended.
Understanding Different Drywall Anchors: How Does Type Affect Drill Bit Choice?
Drywall anchors come in various designs, each suited for different loads and installation methods. Understanding these different types helps in selecting the appropriate drill bit.
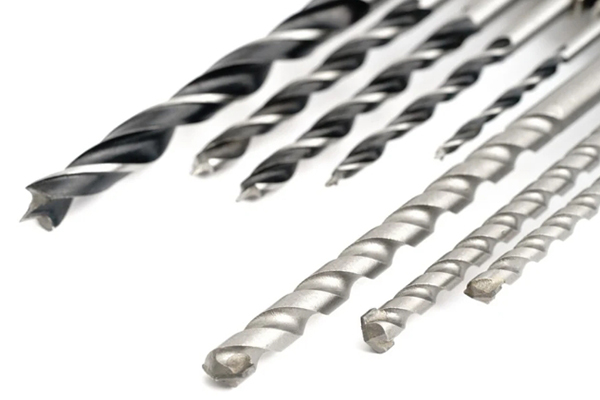
- Conical Plastic Anchors (Expansion Anchors): These are common for light-duty tasks. They typically require a pre-drill hole slightly smaller than the anchor‘s widest diameter, allowing the plastic to expand and grip as the screw is driven in. The packaging usually specifies the required drill bit size.
- Self-Drilling Anchors: Often made of metal or hard nylon, these feature aggressive threads that cut directly into the drywall, eliminating the need for a pre-drill hole in most cases. They are generally stronger than basic plastic anchors. You just drill them in directly with a screwdriver or drill.
- Sleeve-Type Anchors (e.g., Molly Bolts): These metal anchors have a sleeve that expands behind the drywall as the screw is tightened. They require a precise pre-drill hole matching the sleeve’s diameter to function correctly.
- Toggle Bolts: Ideal for heavier items, these feature spring-loaded wings that fold to pass through a hole and then expand behind the drywall. Toggle bolts require a significantly larger hole than other anchor types to accommodate the folded wing mechanism during installation.
- Threaded Drywall Anchors: These usually have wide threads and are screwed directly into the drywall using a screwdriver or drill. Some might recommend a small pilot hole in harder drywall, but often they are designed to self-tap.
The specific type of anchor depends heavily on the weight it needs to support and the thickness of the drywall. Always consult the manufacturer’s instructions, as the required drill bit size is directly tied to the anchor‘s design and mechanism.
How Can I Easily Find the Correct Drill Bit Size for My Wall Anchors?
Finding the right drill bit size is usually straightforward. The most reliable source is the anchor‘s packaging or the manufacturer’s instructions. Reputable manufacturers clearly state the required drill bit size, often in both imperial (inches) and metric (mm) units. Look for phrases like “Use X size drill bit” or a symbol indicating the drill bit diameter. This spec is crucial for ensuring the anchor performs as tested.
If you’re buying anchors in bulk, like our B2B customers often do, ensure this information is included in the product specifications or datasheets we provide. For end-users, keeping the packaging or noting down the required size drill bit when purchasing is a good habit. Sometimes, the size is even embossed directly onto the anchor itself, particularly on larger plastic or metal anchors. Taking a moment to find this information saves significant time and potential frustration during the install process. Remember, the manufacturer has determined the optimal hole size for their specific anchor design and material.
Using the specified drill bit size ensures the anchor fits snugly, expands correctly, and achieves its maximum holding power. It avoids guesswork and prevents wall damage or compromised installations. Always double-check the spec before you drill. If you are dealing with specialized anchors like Self-drilling Hollow Anchor, the technical data sheet is your best friend for precise drilling requirements.
No Size Listed? Methods to Determine the Right Drill Bit Size for Your Anchor.
What happens if you have an anchor but no packaging or instructions indicating the drill bit size? Don’t guess! There are a couple of reliable methods to determine the right size drill bit to use.
One common technique is to visually compare the drill bit to the anchor. Hold the drill bit against the front (or widest part) of the anchor body, not including any threads if it’s a threaded anchor. The correct drill bit size should match the outside diameter of the main body or be just slightly smaller. The goal is for the shank of the drill bit (the solid part, not the cutting edges) to look about the same diameter as the anchor body that will sit inside the drywall. For a conical plastic anchor, you often want the drill bit to be the size of the anchor‘s tip, allowing the body to expand tightly.
Another method is to measure the shank of the anchor itself using calipers if you have them. If not, you can carefully hold drill bits against the anchor body until you find one that visually matches the diameter of the anchor. Start with a drill bit you think is slightly too small and work your way up. It’s better to drill a slightly undersized hole first and enlarge it if necessary, rather than drilling too large initially. For metal or plastic anchors that need a snug fit, the hole should allow you to push the anchor in with firm pressure, possibly needing a gentle tap from a hammer, but it shouldn’t slide in loosely or require excessive force. If you know the hole needs to be, say, 8mm, use an 8mm drill bit.
Does the Wall Material Matter? Adjusting Drill Bit Size for Drywall vs. Masonry?
Yes, the wall material significantly impacts both the type of anchor you should use and potentially the drill bit required, though the drill bit size relative to the anchor often remains the same. The key difference lies in the type of drill bit and the drilling technique.
For drywall, a standard twist drill bit is usually sufficient. The goal is a clean hole of the precise diameter needed for the drywall anchor. The size recommended on the anchor packaging is typically specific to drywall or similar softer materials.
However, if you hit a wooden stud behind the drywall, you might not need an anchor at all – a simple screw directly into the stud is much stronger. If you must drill into the stud for an anchor, use a wood bit.
For harder materials like brick, concrete, or masonry, you absolutely need a specific masonry drill bit, recognizable by its carbide tip. You’ll also likely need a hammer drill function to effectively penetrate the material. While the required hole diameter for the anchor might be the same (e.g., an 8mm anchor often needs an 8mm hole), drilling into masonry requires more effort and the correct tools. Using a standard drill bit on brick will quickly dull the bit and make little progress. Always ensure your anchor is rated for use in masonry, as standard drywall anchors will not work. Specialized anchors, like wedge anchors or sleeve anchors, are designed for these harder materials and will have specific drill bit size requirements listed.
The Risks of Error: What If My Pre-Drill Hole is Incorrect for the Anchor?
Drilling the wrong size hole for your wall anchor can lead to several problems, ranging from minor annoyances to significant safety concerns. Understanding these risks underscores the importance of precision.
If the hole you drill is too large:
- Loose Fit: The anchor won’t grip the drywall securely. It may spin when you try to insert the screw or pull out easily under load.
- Reduced Holding Power: The anchor cannot expand correctly or distribute the weight effectively, significantly lowering its load-bearing capacity.
- Wall Damage: A loose anchor can wobble and enlarge the hole over time, potentially damaging the surrounding drywall.
- Failure: In the worst case, the anchor could fail completely, causing whatever is mounted to fall.
If the hole you drill is too small:
- Difficult Installation: You’ll struggle to insert the anchor into the hole. Forcing it can damage the anchor itself, especially plastic ones.
- Wall Damage: Trying to hammer an oversized anchor into a small hole can cause the drywall to crack, bulge, or crumble around the opening.
- Improper Function: The anchor might not sit flush with the wall or may not expand correctly because it’s constricted, again reducing its effectiveness.
- Stripped Screw Head: If the anchor isn’t seated properly, driving the screw can be difficult, increasing the risk of stripping the screw head.
Precision is key. Taking the extra minute to confirm and use the right drill bit size prevents these issues and ensures a reliable fix. If you find you’ve made a mistake, it’s often better to reposition slightly and drill a new, correct hole rather than trying to fix an incorrectly sized one, especially if it’s too large.
To Pre-Drill or Not? Which Drywall Anchors Need a Pilot Hole?
Whether you need to pre-drill a hole depends entirely on the type of drywall anchor you’re using. It’s not a one-size-fits-all situation.
- Anchors Requiring Pre-Drilling:
- Expansion Anchors (Plastic Conical): These absolutely require a pre-drill hole. The hole size needs to be precise, usually slightly smaller than the anchor‘s maximum diameter, allowing the anchor to expand tightly when the screw is inserted.
- Sleeve-Type Anchors (Molly Bolts): These metal anchors need a hole exactly matching the sleeve’s diameter so it can be inserted before the screw expands it.
- Toggle Bolts: These require a relatively large pre-drill hole to allow the folded wings to pass through the drywall. The size of the hole is critical for installation.
- Anchors Usually NOT Requiring Pre-Drilling (Self-Drilling/Tapping):
- Self-Drilling Threaded Anchors: These are designed with sharp points and aggressive threads (often resembling a large screw) specifically to drill their own hole directly into drywall. Using a power drill or screwdriver is all that’s needed. Forcing these often requires less effort than traditional drilling and anchor insertion.
- Some Heavy-Duty Threaded Anchors: While many are self-drilling, some heavier versions might recommend a small pilot hole to ease insertion, especially in dense drywall. Check the instructions.
Always refer to the manufacturer’s instructions for the specific anchor you are using. Assuming an anchor is self-drilling when it isn’t can lead to significant drywall damage. Conversely, pre-drilling for a self-drilling anchor might make the hole slightly too large, potentially reducing its grip. Using the correct method ensures the anchor is the right size and type for the job and installed properly for maximum strength.
What About Toggle Bolts? Special Drill Bit Considerations for Winged Anchors.
Toggle bolts are a popular choice for hanging heavier items on hollow walls like drywall because their wings spread the load over a larger area behind the wall. However, they have unique drill bit requirements compared to other anchors. The main consideration is that the hole must be large enough for the folded toggle mechanism (the spring-loaded wings) to pass through.
This means the required drill bit size for a toggle bolt is determined by the size of the wings when folded, not by the diameter of the bolt (the screw part) itself. Consequently, toggle bolts require significantly larger holes than expansion or sleeve anchors holding a similar bolt size. For example, a 1/4-inch toggle bolt might require a 1/2-inch or even larger hole.
The packaging for the toggle bolt is the definitive source for the correct drill bit size. It’s crucial to use the exact size specified. If the hole is too small, you won’t be able to push the toggle through. If the hole is excessively large, the bolt head or washer might not adequately cover the hole aesthetically, or in extreme cases, could even pull through if the washer is too small. Remember to drill carefully, as creating a large hole in drywall can sometimes cause chipping if the drill bit isn’t sharp or if too much pressure is applied too quickly. These wings can hold heavier weights effectively only when installed through the correctly sized opening.
Drilling for Strength: Heavy Loads and Choosing the Right Anchor/Drill Bit Combo
When mounting heavy objects – think large mirrors, shelving units, or TV mounts – simply using any wall anchor isn’t enough. You need to select an anchor specifically rated for the intended load and ensure it’s installed perfectly, which again brings us back to the critical role of the correct drill bit size.
For substantial loads on drywall, toggle bolts or heavy-duty sleeve-type anchors (like molly bolts) are often the preferred choices. Self-drilling anchors, while convenient, typically have lower weight limits. The anchor‘s packaging will state its maximum holding weight, but remember this is often under ideal conditions. It’s wise to choose an anchor rated significantly higher than your actual load for a safety margin.
Crucially, the holding power specified by the manufacturer assumes correct installation, including using the precise drill bit size recommended. A toggle bolt needing a 5/8-inch hole won’t achieve its rated strength if installed in a 3/4-inch hole, as the wings won’t bear flush against the back of the drywall. Similarly, a sleeve anchor in an oversized hole won’t expand tightly enough. Using the right drill bit size ensures the anchor engages the drywall as designed, maximizing its capacity to distribute the weight and resist pull-out forces. If dealing with very heavy loads, locating a wall stud and driving a screw or lag bolt directly into it is always the strongest and safest option, bypassing the need for a drywall anchor altogether.
Expert Advice: Best Practices for Drilling and Installing Wall Anchors Securely
As a supplier of drilling tools and anchor systems, we want our clients and their end-users to achieve successful, reliable installations every time. Here are some best practices distilled from years of experience:
- Always Read the Instructions: The anchor packaging is your primary guide for the correct drill bit size and installation steps.
- Select the Appropriate Drill Bit: Use the exact size drill bit specified. For drywall, use a standard twist bit; for masonry (brick, concrete), use a carbide-tipped masonry bit and a hammer drill. Ensure the bit is sharp for a clean hole.
- Measure Twice, Drill Once: Double-check your measurements for placement before drilling. Mark the spot clearly with a pencil.
- Hold the Drill Perpendicular: Hold the drill straight and steady, perpendicular to the wall surface, to ensure the hole is straight. Apply steady, moderate pressure.
- Control Dust: Drilling creates dust. Have a vacuum handy or use dust collection attachments if available, especially when drilling masonry.
- Check Hole Depth (If Applicable): Some anchors require a specific depth. Wrap tape around your drill bit at the required depth as a visual guide.
- Clean the Hole: Especially in masonry, clear dust and debris from the hole before inserting the anchor. This allows for proper seating and function.
- Insert the Anchor Correctly: Push the anchor in until it’s flush with the wall surface. If it requires tapping, use a hammer gently. If you encounter significant resistance, the hole might be too small. If it’s very loose, the hole is too big. Consider using the next size if you have difficulty finding a snug fit initially (start smallest).
- Set the Anchor: Insert the screw and tighten it according to the anchor type. For expansion anchors, tightening drives the screw and expands the anchor. For toggle bolts, tighten until the wings are firmly drawn against the back of the drywall. Avoid over-tightening, which can strip the anchor or damage the drywall.
Following these steps, combined with using quality anchors and the right drill bit size, will lead to secure and reliable mounting. Quality components like our range of Rock Drilling Bits ensure that the drilling process itself is efficient and precise.
Key Takeaways for Perfect Anchor Installation
Achieving a secure fix with wall anchors, particularly in drywall, hinges on attention to detail. Remember these crucial points:
- Match the Drill Bit Size: Always use the drill bit size specified on the anchor‘s packaging or instructions. This ensures a snug fit and proper anchor function.
- Know Your Anchor Type: Different anchors (expansion, sleeve, toggle, self-drilling) have different drill bit requirements. Some need a pre-drill hole; others don’t.
- Determine Size if Unmarked: If the size isn’t listed, carefully compare the drill bit diameter to the anchor body (diameter of the anchor) or measure the shank. Aim for a hole that allows a firm push-fit.
- Use the Right Bit for the Material: Standard bits for drywall, masonry bits (and often a hammer drill) for brick or concrete.
- Avoid Incorrect Hole Sizes: Too large means a loose anchor and reduced strength. Too small means difficult installation and potential wall/anchor damage.
- Consider the Load: Use anchors rated for the weight you intend to hang. For heavy items, toggle bolts, sleeve anchors, or securing directly to a stud are best.
- Follow Best Practices: Drill straight, clean the hole, insert the anchor correctly until flush, and tighten the screw appropriately without overdoing it.
By focusing on selecting the right drill bit size and following proper installation techniques, you can confidently use wall anchors for a wide range of mounting tasks, ensuring safety and durability. As manufacturers, we believe that providing quality products like durable bolts and precise anchors goes hand-in-hand with ensuring users have the knowledge to install them effectively.
Post time: 4 月-14-2025